- Startup
- 6
- Active
- 3
- Recovery
- 10
- On hit
- +4
- On block
- -2
- Damage
- 300
- Guard
- LH
- Cancel
- Chn Sp SA
- Total
- 18
- Punish counter
- +8
- Drive dmg (block)
- 500
- Drive gain
- 250
Chains into 5LP/2LP/2LK; DR cancel is delayed until after 2nd active frame
The elegant ex-Shadaloo financier saunters onto the battlefield as a slow but powerful zoner. Unlike other zoners who focus on firing off quick projectiles or pestering opponents with fast and long-ranged normals, JP chooses instead to bury his opposition in a barrage of psychic power. JP wants his opponents sitting still, for it is when they feel there is no hope of escape that he can set them up for a devious mixup situation.
JP's central special moves are Torbalan and Triglav. The former is a slow but large projectile that can be fired along three different lanes of movement, and the latter is a nearly instant spike attack that can come out at nearly any part of the screen. While Torbalan is slow, it has a ton of uses and can even mix up your opponents as one variant is a low and another is an overhead. Triglav meanwhile acts as both a detterent and anti-air, catching people trying to move towards JP and sniping out poor air approaches. With these two special moves, JP forces his opponents back towards the corner and continues to bury them in full-screen pressure. Once an opponent has eaten a combo or chooses to sit still for long enough, JP can deploy his signature Departure, a portal that will either shoot out a tracking spike or act as a teleport point for JP to warp to at any time.
While JP's zoning is strong, any good opponent will eventually get past it. Once they are within striking distance, JP likes to use his midrange pokes to bat opponents backwards. 5HP is a great callout tool that can be special canceled, while his 2HP is a solid anti-air and his 2MK is a fantastic poke. Any good hit JP gets can be instantly canceled into a Drive Rush combo that sends your opponent to the opposite end of the screen and allows him to resume his zoning. Opponents who make overly-deliberate plays can be hit with JP's counter Amnesia, which deals no damage but leaves opponents stuck to a timed bomb.
JP has an extremely large mixup toolbox. His throw game is very strong and has high reward, but he can also perform powerful high/low mixups if he has Depature set up above you. His level 2 super is an incredible mixup tool that can be used to create airtight mixups, resets, and even full-on unblockables to melt your health bar. JP has mixups everywhere- he has mixups in his Target Combos, he has mixups in his pressure sequences, and he even has mixups in his zoning! JP has access to Embrace, a fullscreen projectile command grab that gives JP excellent pressure opportunity on hit, looks just like Torbalan, and does high damage.
It's important to stress that all this offensive power comes at a steep cost, that being JP's movement. Unlike other zoners who don't necessarily sacrifice movement for their zoning prowess, JP has terrible movement stats and must rely on Drive Rush for any considerable mobility. In addition, JP's zoning specials are very slow and open him up to punish opportunities on an incorrect play that other zoners might be safe from. JP also has a notable deadzone within the midrange, where his pokes are either fast, but too stubby, or long, but too slow. His tall standing hurtbox and wide frame also make him vulnerable to mixups at a greater extent than other members of the cast, and while he does have Amnesia to bail him out of bad scenarios, that too carries immense risk. In general, JP is great for players who love to keep their opponents at a constant disadvantage and can manage to get around his slower movement. If you love overwhelming offensive might without having to get your hands too dirty, then there's no better pick than this master of Psycho Power.
Neverending Barrage: Having a strong zoning game, with high/low projectiles of varying speeds
Devious Mixups: Numerous mixup methods, including high/low target combos, plus on block projectiles, a command grab, a portal that he can teleport to for overheads, and the scariest Level 2 in the game
Bulwark: Excellent anti-air control with a superb 2HP and a powerful anti-air special
Sluggish: Slower than average, both in walkspeed and Drive Rush
No Cancelable Lows: Despite bolstering some exceptional pokes, he lacks a cancelable low
Specialist: Plays unlike anyone else in the cast and will demand a decent amount of training to get to grips with his gameplay
Chains into 5LP/2LP/2LK; DR cancel is delayed until after 2nd active frame
Long-range poke with great hitbox priority; cancelable into 214HP projectile or 214LP/MP Teleport when Departure portal is active
JP's main combo/juggle/punish tool (essentially a cancelable version of 5MP with less range); Punish Counter allows a 1-bar Drive Rush follow-up, or a cancel into 214PP with enough frame advantage to link 2MP afterwards; has juggle potential even without Drive Rush; puts airborne opponents into a limited juggle state; extends a large hurtbox 1f before active that is vulnerable to projectiles; hurtbox is extended horizontally during all active and recovery frames for easier whiff punishability
DR cancel is delayed until after 2nd active frame
Cancelable poke and combo tool; special/DR/DI cancel is delayed until after active frames; foot hurtbox does not extend until frame 11 (useful vs. low pokes)
Useful anti-air and combo/pressure starter with a confirmable Target Combo follow-up; whiffs on crouching opponents from farther away unless they extend a vertical hurtbox; pushback on block keeps JP out of throw range even after Drive Rush; cancelable into 214HP projectile or 214LP/MP Teleport when Departure portal is active
True blockstring from 5HK (up to 1f gap on block if delayed to final cancel frame); safe on block and easily confirmed into a follow-up special or Drive Rush on hit; TC follow-ups cannot be comboed into unless the HP itself lands as a Counter-hit/Punish Counter; special/DR/DI cancel is delayed until after 2nd active frame
TC low ender; does not combo naturally from 5HK~HP; 8f blockstring gap makes it easily interruptible
TC overhead ender; does not combo naturally from 5HK~HP; 8f blockstring gap makes it easily interruptible
Chains into 5LP/2LP/2LK; JP's only 4f normal, making it an important defensive option; DR cancel is delayed until after 2nd active frame; topmost hurtbox on frames 1-5 is vulnerable only to aerial strikes (preventing its use as an anti-air)
Good poke and combo/buffer tool; special/DR/DI cancel is delayed until after active frames; has an extended hurtbox on whiff until the end of recovery; topmost hurtbox on frames 1-10 is vulnerable only to aerial strikes (preventing its use as an anti-air)
Solid anti-air but cannot hit cross-up; arm hurtbox is anti-air invuln on active frames 2-6; very short horizontal range; fastest of JP's heavy normals, making it useful in some Drive Rush combo routes; high juggle potential even without Drive Rush
Chains into 5LP/2LP/2LK; cancelable into 214HP projectile or 214LP/MP Teleport when Departure portal is active
Long range low poke that moves JP forward; after Drive Rush or Punish Counter, can confirm into 2MP; has an extended hurtbox on whiff until the end of recovery; cancelable into 214HP projectile or 214LP/MP Teleport when Departure portal is active
Short ranged sweep with good hitbox priority; very difficult for most characters to punish if well spaced; has juggle potential even without Drive Rush
Safe overhead that can link into 2LP with a meaty connect, or 2MP with a Drive Rush or Punish Counter
Solid anti-air (but a little slow and cannot hit cross-up); launches opponent into limited juggle state; 1st hit forces stand on hit; 2nd hit whiffs on crouching opponents for 3f worse advantage on crouch block; only 2nd hit is cancelable, so JP cannot make himself safe on a crouch blocking opponent (but if 6HK hits and the 2nd hit whiffs, the cancel can still come out); useful in many Drive Rush juggle routes; special/DR/DI cancel is delayed until after 4th active frame (2nd active frame of 2nd hit)
Cancelable to Grom Strelka Target Combo with a very lenient hitconfirm window (1f blockstring gap if canceled into TC)
Cancelable combo tool that can be hitconfirmed from 4MP; 1f gap between hits on block
Long range advancing sweep; can be difficult to punish if well spaced; high juggle potential even without Drive Rush; no longer a Hard Knockdown if juggled into
Very long horizontal range; extends a large hurtbox 2f before active that makes it easily counterpoked out of the air; lower body projectile invuln 12-22f (cannot be used to avoid the 2nd hit of JP's OD Amnesia bombs)
Causes spike knockdown vs. airborne opponents on Counter-hit/Punish Counter; good downwards hitbox priority; lower body projectile invuln 9-23f except around attack hitbox (cannot be used to avoid the 2nd hit of JP's OD Amnesia bombs)
Cross-up; can be used as a fuzzy instant overhead (requires perfect safe jump timing)
Puts airborne opponents into a limited juggle state (similar to j.MP for most characters); useful for air-to-airs and juggles; lower body projectile invuln 7-20f (if used immediately on the way up, can avoid the 2nd hit of JP's OD Amnesia bombs)
JP's best overall jump-in tool with decent hitbox priority; extends a hurtbox 1f before active, making it susceptible to being counterpoked out of the air; lower body projectile invuln 11-19f except around attack hitbox (cannot be used to avoid the 2nd hit of JP's OD Amnesia bombs)
Side switch; throws opponent almost full screen away; after throwing opponent into corner, can dash to become +14 (no true strike/throw oki without Drive Rush); opponent can be juggled into SA2, Departure spike, or Amnesia projectiles before damage is applied, in which case there is no additional damage scaling; a successful Throw Escape builds 0.5 Drive bars for the defender; Throw Escape is awarded to a random player if input simultaneously
Side switch; can get oki if throwing opponent backwards into the corner; midscreen oki is very weak (better to set up Departure or throw a projectile)
Can dash forward for weak corner pressure (+1 after dash, throw loses to 4f lights), or Drive Rush for a manually timed strike/throw mixup (2MP is best, 5HK is auto-timed +7 oB but far out of throw range); throws opponent almost full screen away; damage scaling is applied when juggling into SA2, Departure spike, or Amnesia projectiles; a successful Throw Escape builds 0.5 Drive bars for the defender; Throw Escape is awarded to a random player if input simultaneously
1-hit projectile command grab; clashes with non-OD projectiles; can be comboed into against grounded opponents; minimum 72f total animation; startup increases at long range due to projectile grab travel time; cannot be performed if SA2 or a Departure portal are active on the screen; projectile speed decelerates by 0.01/frame when in proximity of opponent
1-hit OD projectile command grab; clashes with OD projectiles (can destroy non-OD projectiles, allowing the throw to continue); can be comboed into against grounded opponents; minimum 72f total animation; startup increases at long range due to projectile grab travel time; cannot be performed if SA2 or a Departure portal are active on the screen; projectile speed decelerates by 0.01/frame when in proximity of opponent
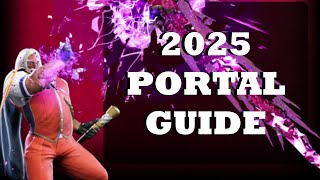
Spawns a portal in the air according to button strength (LP close, MP mid, HP far); while the portal is active, JP cannot use 214P command grab; portal disappears if JP is hit or thrown; can manually input 214LP/MP or 214HP follow-up while portal is active; if no follow-up is input, the portal automatically spawns a 1-hit spike projectile toward the opponent 100f after JP recovers (150f total startup); spike puts opponents into a free juggle state; the automatic spike activation allows for strong mixups, as JP is free to move while it occurs (unlike 214P~214HP version where he snaps his fingers); cannot spawn another portal until the first has disappeared; Juggle Increase value becomes 1 when connecting mid-combo against opponent in a Free Juggle state (ensures that opponent will have Juggle Count 1 after the spike connects)
Spawns 2 portals in the air according to button strengths used (LP close, MP mid, HP far); while the portals are active, JP cannot use 214P command grab; portals disappear if JP is hit or thrown; can manually input 214LP/MP or 214HP follow-up while portals are active; if no follow-up is input, each portal automatically spawns a 1-hit OD spike projectile (starting with the closest portal) angled toward the opponent 70f after JP recovers (110f total startup); spikes put opponents into a free juggle state; the automatic spike activation allows for strong mixups, as JP is free to move while it occurs (unlike 214PP~214HP version where he snaps his fingers); cannot spawn another portal until both have disappeared; Juggle Increase value becomes 1 when connecting mid-combo against opponent in a Free Juggle state (ensures that opponent will have Juggle Count 1 after the spikes connect)
Spawns 2 separate OD projectile spikes beginning from the closest portal; spikes are angled downward toward the opponent; for each spike, 1st active frame only hits airborne or tall standing characters; 2nd active frame reaches regular-size standing characters; 3rd active frame reaches all crouching characters; useful tool for zoning, juggles, chip damage, and oki; puts opponent into free juggle state on hit; opponent builds 40% extra Drive meter when parrying the spikes; Juggle Increase value becomes 1 when connecting mid-combo against opponent in a Free Juggle state (ensures that opponent will have Juggle Count 1 after the spikes connect); can be canceled into from 2LK / 5MP / 2MK / 5HK despite not usually being cancelable
Spawns a 1-hit projectile spike from the active portal; spike is angled downward toward the opponent; 1st active frame only hits airborne or tall standing characters; 2nd active frame reaches regular-size standing characters; 3rd active frame reaches all crouching characters; useful tool for zoning, juggles, chip damage, and oki; puts opponent into free juggle state on hit; opponent builds 50% extra Drive meter when parrying the spike; Juggle Increase value becomes 1 when connecting mid-combo against opponent in a Free Juggle state (ensures that opponent will have Juggle Count 1 after the spike connects); can be canceled into from 2LK / 5MP / 2MK / 5HK despite not usually being cancelable
Fully invincible while off-screen; Punish Counter state while airborne; teleports to portal location and causes portal to disappear (after OD Departure, LP version goes to close portal while MP version goes to far portal); JP can act in the air on frames 31-41; JP always faces the opponent after reappearing; if no air attack is used, JP has 1 punishable landing frame, then can block on the next 2 landing frames; can be canceled into from 2LK / 5MP / 2MK / 5HK despite not usually being cancelable
Counters strikes (but not projectiles or throws) on frames 3-20; JP is in a counter-hit state on frames 1-2, then a Punish Counter state until end of recovery; 17f recovery on a successful counter is fully invincible; resulting frame advantage depends on which move the opponent used (JP can be at frame disadvantage); successful counter places a bomb near the opponent that tracks their location; prevents the opponent from canceling their attack, similar to a Perfect Parry; cannot be input again until bomb detonates
Counters strikes and throws (but not projectiles) on frames 1-20; JP is in a Punish Counter state until end of recovery; fully invincible 17f recovery on a successful counter (can vary slightly depending on the attack countered); countering a Throw always incurs 21f recovery, leaving the opponent -4 at worst or safe after a meaty Throw; resulting frame advantage depends on which move the opponent used (JP can be at frame disadvantage); successful counter places 2 bombs near the opponent that track their location; prevents the opponent from canceling their attack, similar to a Perfect Parry; cannot be input again until both bombs detonate
Projectile hitbox; bombs track the opponent's location; before detonating, bombs destroy any non-Super projectile; bombs are destroyed if they interact with Super projectile; bombs cause proximity guard, limiting the opponent's movement until they explode; bombs detonate immediately if JP cancels a move into SA3 while active (preventing him from bypassing the damage scaling); opponent builds 50% extra Drive meter from parrying the bombs
Projectile hitbox; bomb tracks the opponent's location; before detonating, bomb destroys any non-Super projectile; bomb is destroyed if it interacts with Super projectile; bomb causes proximity guard, limiting the opponent's movement until it explodes; bomb detonates immediately if JP cancels a move into SA3 while active (preventing him from bypassing the damage scaling)
1-hit projectile; button strength determines spike position (LP close, MP mid, HP far); spike appears from the ground and travels upward (takes 3f to reach max height); in the corner, all versions stop at the edge of the screen; puts opponent into limited juggle state on hit; useful tool for zoning, juggles, and block pressure (can be very plus on block with meaty timing)
Spawns two separate 1-hit OD projectiles; spike position depends on button combination (LP+MP close, LP+HP mid, MP+HP far); each spike appears from the ground and travels upward (takes 3f to reach max height); in the corner, all versions stop at the edge of the screen; puts opponent into limited juggle state on hit (can juggle into a meterless Triglav afterward); useful tool for zoning, juggles, and block pressure (can be very plus on block with meaty timing); frame advantage can increase slightly if the 2 spike hits are staggered
Spawns a "ghost" that travels toward opponent and clashes with 1-hit non-OD projectiles; upon reaching the opponent, begins an 12f low-hitting projectile attack; if the opponent moves forward quickly, it is possible to dodge the projectile entire since it is not active while traveling; from longer range, total startup increases and grants better frame advantage; cannot be used while SA2 is active; cancel into SA3 won't combo at close range without CH/PC; projectile speed decelerates by 0.01/frame when in proximity of opponent
1st hit is a strike hitbox that clashes with non-OD projectiles; 2nd hit is a 1-hit non-OD projectile (but can be Perfect Parried like a strike); together, both hits can nullify a 2-hit non-OD projectile (though the large gap between hits makes this impractical); 2nd hit has more range than the 1st hit; causes a wall bounce on hit (limited juggle state); cannot hit cross-up (behind JP); direct SA3 cancel will not usually juggle; 8f hitstop when clashing with opponent's projectile; 1st hit has 3f extra recovery when Perfect Parried, allowing a Drive Impact punish (recovery is unchanged if the 2nd attack hits opponent); 2nd hit expands if the 1st hit connects (for combo consistency)
Spawns a "ghost" that travels toward opponent with 2-hit OD projectile priority; upon reaching the opponent, begins an OD projectile attack with 8f startup; after clashing with 1-hit OD projectile, only the 1st hit of the projectile attack will come out; SA2 cancel is a true blockstring or combo into the projectile attacks; if the opponent moves forward quickly, it is possible to dodge the projectile entire since it is not active while traveling; from longer range, total startup increases and grants better frame advantage; cannot be used while SA2 is active; if 1st hit is Perfect Parried, leaves a large gap where JP can be punished if close enough; projectile speed decelerates by 0.01/frame when in proximity of opponent
Great tool for baiting the opponent into whiffing Parry, jumping, or using anti-projectile attack
Spawns a "ghost" that travels toward opponent and clashes with 1-hit non-OD projectiles; upon reaching the opponent, begins an 8f projectile attack; if the opponent moves forward quickly, it is possible to dodge the projectile entire since it is not active while traveling; from longer range, total startup increases and grants better frame advantage; cannot be used while SA2 is active; projectile speed decelerates by 0.01/frame when in proximity of opponent
1st hit is a strike hitbox that clashes with non-OD projectiles; 2nd hit is a 1-hit non-OD projectile (but can be Perfect Parried like a strike; together, both hits can nullify a 2-hit non-OD projectile; 2nd hit has more range than the 1st hit; puts opponents into limited juggle state on hit; cannot hit cross-up (behind JP); 8f hitstop when clashing with opponent's projectile; 2nd hit expands if the 1st hit connects (for combo consistency)
Spawns a "ghost" that travels toward opponent and clashes with 1-hit non-OD projectiles; upon reaching the opponent, begins an 12f overhead projectile attack; if the opponent moves forward quickly, it is possible to dodge the projectile entire since it is not active while traveling; from longer range, total startup increases and grants better frame advantage; cannot be used while SA2 is active; cancel into SA3 won't combo at close range without CH/PC; projectile speed decelerates by 0.01/frame when in proximity of opponent
1st hit is a strike hitbox that clashes with non-OD projectiles; 2nd hit is a 1-hit non-OD projectile (but can be Perfect Parried like a strike; together, both hits can nullify a 2-hit non-OD projectile; 2nd hit has more range than the 1st hit; puts opponents into limited juggle state on hit; in the corner, launched high enough to juggle into the first hit of SA1; cannot hit cross-up (behind JP); 8f hitstop when clashing with opponent's projectile; 2nd hit expands if the 1st hit connects (for combo consistency)
1st hit is a strike hitbox that clashes with OD projectiles; 2nd hit is a 1-hit OD projectile (but can be Perfect Parried like a strike); together, both hits can nullify a 2-hit OD projectile; 2nd hit has more range than the 1st hit; causes a wall bounce on hit (limited juggle state); cannot hit cross-up (behind JP); SA3 cancel will whiff at point blank (but works consistently after canceling normals into 236PP); 8f hitstop when clashing with opponent's projectile; 1st hit has 3f extra recovery when Perfect Parried, allowing a Drive Impact punish (recovery is unchanged if the 2nd attack hits opponent); 2nd hit expands if the 1st hit connects (for combo consistency); 2nd hit does double damage when the 1st hit whiffs
Spawns 4 separate 1-hit Super projectiles that track the opponent; starter scaling applies to 3rd attack in the combo; immediate scaling applies to the SA2 projectiles if comboed into; total startup for each hit of the sequence is 34f, 71f, 108f, 145f; leaves a 17f gap between each projectile on block; hitstun/blockstun values include the 13f hitstop inflicted on the defender
Teleports to the opponent's location; extends a high combo-only hitbox but can still whiff if opponent is juggled too high; can be comboed into from anywhere on the screen; cinematic time regenerates ~1.8 Drive bars for JP; leaves opponent 3/4 screen away after cinematic
Teleports to the opponent's location; extends a high combo-only hitbox but can still whiff if opponent is juggled too high; can be comboed into from anywhere on the screen; available at 25% HP or below; cinematic time regenerates ~2.2 Drive bars for JP; leaves opponent fullscreen after cinematic with enough time to set up a Departure portal
Super projectile hitbox; 1st hit (active frames 1-14) can be Perfect Parried like a strike; 2nd hit travels fullscreen; has high juggle potential, making it especially useful in combos where JP is close enough for the initial hit to connect; 8f hitstop when clashing with opponent's projectile
Performed by inputting 6HPHK during blockstun; 5f extra recovery on hit; freezes the screen for 4f during startup; see Drive Reversal.
Performed by holding 6HPHK on wakeup; 5f extra recovery on hit; does not have any screen freeze except for a 12f freeze when interacting with the opponent's throw hitbox (this also refunds 1 Drive bar after punishing the throw); see Drive Reversal.
See Drive Impact. Airborne connect gives spinning juggle state on Punish Counter or corner Wall Splat with variable height.
See Drive Parry. Perfect Parrying has only 1F of recovery and disables the opponent from canceling their attack. Perfect Parrying projectiles puts you into fixed 11 frames of recovery. After a Perfect Parry, all Super Gauge gain is reduced by 20% and Drive Gauge gain/damage is reduced by 50% for the entire punish combo.
See Drive Rush; 3-bar version performed on hit/block from a cancelable normal; can also be performed on whiff from cancelable light normals; startup refers to minimum time before an attack can cancel the Drive Rush animation; the first 15 recovery frames are cancelable into any attack; the final 22 recovery frames are cancelable into any attack or movement option or blocking (except Parry); only Normal and Command Normal attacks are enhanced with +4 frame advantage and improved juggle properties
See Drive Rush; 1-bar version performed out of a Parry; startup refers to minimum time before an attack can cancel the Drive Rush animation (if performed immediately after a successful Parry, only 1+8 startup); the first 15 recovery frames are cancelable into any attack; the final 22 recovery frames are cancelable into any attack or movement option or blocking (except Parry); only Normal and Command Normal attacks are enhanced with +4 frame advantage and improved juggle properties; Distance: 0.525 (min/throw), 1.857 (min/block), 3.628 (max/final DR frame)
"Is this fight not what you wanted?"
"Is... something the matter?"
"Do you need to take a rest?"
Character data, frame data and patch notes are mirrored from the SuperCombo wiki, maintained by the community under CC BY-SA.