5LP
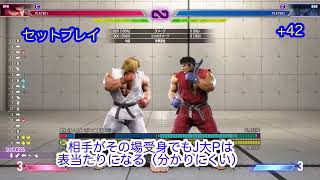
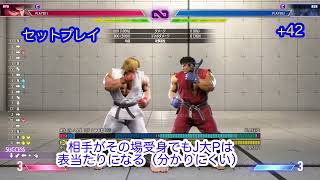
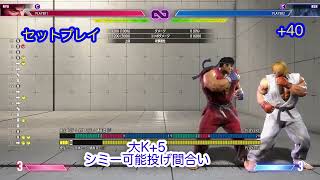
Standing Light Punch
- Startup
- 4
- Active
- 3
- Recovery
- 7
- On hit
- +4
- On block
- -1
- Damage
- 300
- Guard
- LH
- Cancel
- Chn Sp SA
- Total
- 13
- Punish counter
- +8
- Drive dmg (block)
- 500
- Drive gain
- 250
Chains into 5LP/2LP/2LK
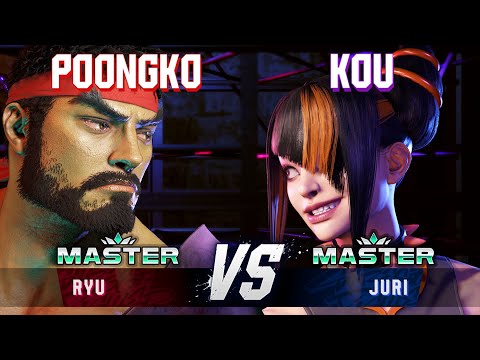
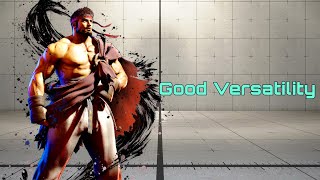
Ryu is the definitive Street Fighter character, and not just because he's been the protagonist for thirty years. As the original shoto character, Ryu embodies all the meaningful aspects of Street Fighter gameplay in one concise package. Ryu emphasizes a patient playstyle with strong defensive tools.
While they probably need no introduction, Ryu's signature moves are Hadoken and Shoryuken, the original fireball and DP combo. Hadoken is a good projectile with variable speeds and decent reward on hit or block, while Shoryuken is a very useful anti-air uppercut that has utility as a reversal with the OD version. From these two moves, a simple gameplan of "Hadoken or Shoryuken" emerges, informing the rest of Ryu's gameplan. Ryu pesters his opponents with his long reaching 2MK and 5HP alongside his jabs and Hadoken. When they jump in frustration, Ryu Shoryukens them back out and starts it all over again. While system mechanics have weakened this playstyle in SF6, it still retains effectiveness if Ryu can tap into system mechanics such as Drive Impact and Drive Parry.
New to Ryu's kit are Denjin Charge and Hashogeki. The former allows Ryu to stock a single charge of a resource called Denjin. When Ryu uses certain specials or supers, Denjin is spent to empower them greatly, giving them added utility on block or hit. This particularly makes his fireballs very formidable, as they become faster and beat out other fireballs of the same level. Hashogeki is a combo tool and pressure tool, giving Ryu a new way to end blockstrings or even reset pressure completely especially when Denjin is spent to either give Ryu easy access to juggles or plus frames on block. Ryu also has Tatsumaki Senpu-kyaku, an advancing spinning kick that provides corner carry and some projectile invulnerability. And returning from Street Fighter 3 is Ryu's High Blade Kick, with each strength being reworked into varying forms of utility including midrange poking, getting a corner safejump, or even big damage combo extensions in the corner. All of these tools combined lend to Ryu being a well rounded character who has many useful options for different situations, and he especially rewards smart play with terrifyingly powerful corner pressure.
Ryu's only weakness is, ironically, his greatest strength: in his commitment to fundamentals, Ryu completely lacks any major gimmicks outside of Denjin (and that is barely a gimmick unto itself). This can make it somewhat difficult for him to steal rounds and effectively demands that he play to said fundamentals at all times. That said, he is still consistent in almost every aspect, getting good return out of every successful play. He does great damage, has good okizeme off of most combo routes, and his versatile kit ensures he can handle any matchup. Ryu is a formidable character that can easily show you the ropes of Street Fighter while also holding his own beyond that. If you want a fundamentals-oriented character who rewards patient and considerate play, then walk the path of student to master with Ryu.
Jack of All Trades…: THE Shoto kit designed to have an option in every situation.
Honed Strikes: Hitting hard, with particularly devastating pressure and damage against cornered opponents.
Enforcer of "Honesty": Extremely interactive pressure with lots of ways to condition the opponent.
...Master of None: Not having an explicit niche other than an explosive damage.
Upfront: Popular character with straight forward game-plan, people will know the matchup.
Chains into 5LP/2LP/2LK

2f extra recovery on whiff; useful combo tool with a Target Combo follow-up; extends a wider body hurtbox until the end of recovery

Hits consistently at max 5MP range, but the LK can whiff if 5MP connects on an extended hurtbox; can be spaced safely against most characters for a spacing trap

(refers to scaled damage); 6f gap before HK on block; cancels to Denjin Charge by inputting 2P on hit only (KD Adv. +7)

Forces stand on hit (allowing Target Combo follow-up to work on crouching opponents); good poke with hitbox priority, many active frames, and a reactable hitconfirm window

HK cannot hit vs. crouch block (much more unsafe); cancels to Denjin Charge by inputting 2P on hit only (KD Adv. +10); can juggle into MP/OD Shoryuken or SA3 in the corner

Good range for a 5f light (useful in punishes and neutral buffers); DR cancel is delayed until after 2nd active frame

Solid poke; front leg hurtbox is raised on frames 4-11 (can avoid low pokes)

Whiffs on crouching opponents unless they extend a vertical hurtbox; 2 extra recovery frames on block; good horizontal anti-air that puts airborne opponents into limited juggle state (higher launch on Punish Counter juggle); +11 before Punish Counter crumple state goes airborne; extends a hurtbox 1f before active that is vulnerable to projectiles

Chains into 5LP/2LP/2LK; topmost hurtbox on frames 1-5 is vulnerable only to aerial strikes (preventing its use as an anti-air)

2f extra recovery on whiff; combo and pressure tool; topmost hurtbox on frames 1-9 is vulnerable only to aerial strikes (preventing its use as an anti-air); extends a wider hurtbox until the end of recovery

Forces stand on hit; decent anti-air; cannot hit cross-ups; fist hurtbox is invincible to air strikes on frame 9; head hurtbox is invincible to air strikes on frames 10-14; only 1st active frame is cancelable (extends a combo-only hitbox to match the range of the 2nd active frame for combo consistency); () refers to hit/block recovery on 1st active frame only; 5f less hitstun on active frames 2-5 (can be punishable on meaty timing)

Chains into 5LP/2LP/2LK

DR cancel is delayed until after active frames

Good range and hitbox priority; has some juggle potential; on block, always plays out a fixed 29f recovery (cannot be made safer with meaty timing)

Counter-hit/Punish Counter/Drive Rush frame advantage applies to both hits; 2nd hit is no longer an overhead if the first hit connects; up to +5 on hit with meaty timing for a meterless combo extension

2 hits; good forward-moving combo starter and pressure tool; if 1st hit connects on an extended hurtbox, becomes +6 on Counter-hit or +8 on Punish Counter; Counter-hit/Punish Counter frame advantage applies to both hits; can be very advantageous if 1st hit trades with a light normal; 1st hit puts opponent into free juggle state so that the 2nd hit connects (to prevent Ryu from being punishable)

Cancelable to regular/OD Air Tatsu on hit/block; Low Crush on frames 13-20 (not airborne); high pushback on block; puts airborne opponents into limited juggle state; good juggle option after midscreen OD High Blade Kick for corner carry and oki; proximity guard box begins on frame 2 and reaches the maximum attack range (prevents opponents from walking back out of the attack startup)

Forces stand on hit; only 1st active frame is cancelable; () refers to hit/block recovery on 1st active frame only; extremely short range makes it finicky in combos; 8f less hitstun on active frames 2-4 (can be punishable with meaty timing)

() refers to 2nd hit startup; 1st hit forces stand and puts airborne opponents into a limited juggle state; 2nd hit puts airborne opponents into OTG bounce state; both hits are cancelable; Counter-hit and Punish Counter frame advantage applies to both hits

Can be used as a fuzzy instant overhead

Both hits are cancelable to Air Tatsu and put airborne opponents into a limited juggle state; if 1st hit is stand blocked, the 2nd hit will not hit overhead against crouch block; lower body projectile invuln 8-22f (if used immediately on the way up, can avoid the 2nd hit of JP's OD Amnesia bombs)

Spike knockdown on counter hit/Punish Counter vs. airborne opponents; lower body projectile invuln 9-23f except around attack hitbox (cannot be used to avoid the 2nd hit of JP's OD Amnesia bombs)

Cross-up

Cross-up; lower body projectile invuln 7-20f (if used immediately on the way up, can avoid the 2nd hit of JP's OD Amnesia bombs)

Strong jump-in from mid to long range; lower body projectile invuln 10-17f except around attack hitbox (cannot be used to avoid the 2nd hit of JP's OD Amnesia bombs)

Side switches; no throw/strike oki after back throwing opponent into corner; a successful Throw Escape builds 0.5 Drive bars for the defender; Throw Escape is awarded to a random player if input simultaneously
Has access to corner throw loops without walking or dashing (whiff 5LP or manually time the next throw); a successful Throw Escape builds 0.5 Drive bars for the defender; Throw Escape is awarded to a random player if input simultaneously

Only 1st hit can connect on crouching (stand blocking any hit forces next hit to be blocked, even if crouching); later hits have better KD Advantage; puts opponent into limited juggle state (can juggle afterward if 3rd hit connects)

2 hits, even if it connects on final active frame; strike hitbox but can nullify 1-hit meterless projectiles; puts opponent into spinning juggle state on hit; leaves Ryu inside throw range for a strike/throw mixup on block

Can hit crouching opponents; puts opponent into limited juggle state; on hit, 1st hit has vacuum effect; on max range block, some hits can drop (-32 at worse)
Can hit crouching opponents
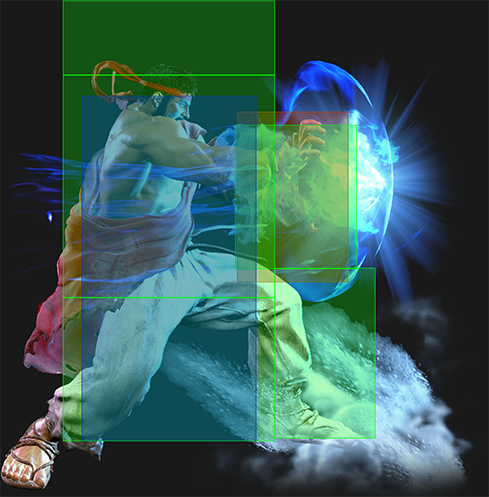
Strike hitbox but can nullify 1-hit meterless projectiles; puts opponent into spinning juggle state on counter-hit/Punish Counter; excellent Burnout pressure tool (+1 on block, but increased pushback against Burnout)
Only 1st hit can connect on crouching (stand blocking 1st hit forces 2nd hit to be blocked, even if crouching); later hits have better KD Advantage

Strike hitbox but can nullify 1-hit meterless projectiles; puts opponent into spinning juggle state on counter-hit/Punish Counter

() refers to recovery on block; strike hitbox but can nullify 2-hit meterless projectile; puts opponent into spinning juggle state on hit; only comes out when the Heavy Punch button is pressed

Strike hitbox but can nullify 1-hit OD projectiles or any meterless projectiles; great pressure tool

1-hit; strike hitbox but can nullify 1-hit OD projectile or any meterless projectile; crumple state is +14 before opponent becomes airborne

Charges up next fireball-based move (Hadoken, Hashogeki, SA1, SA2) into a more powerful Denjin version; Ryu is in a counter-hit state for the entire animation; gains the Denjin charge on frame 50; can only store 1 stock at a time (does not persist between rounds); can also be performed after 5HP~HK or 5MP~LK~HK (on hit) by inputting 2P

Puts opponent into limited juggle state on hit (can follow up with 623MP, 623PP, or SA3 in corner); Punish Counter tumble state can be hit OTG; has great range and forward movement, making it a useful poke in neutral; the last 3 active frames have identical range (the listed best-case frame advantage is when spaced at max range, active frame 7)

1-hit projectile; puts airborne opponents into limited juggle state

Wall Bounce into limited juggle state on hit; if close to corner, opponent flies over Ryu's head
Puts opponent into limited juggle state on hit; sets up auto-timed safe jump against cornered opponents; can combo when canceled from any normal except 5LP; the last 2 active frames have identical range (the listed best-case frame advantage is when spaced at max range, active frame 5)

1-hit projectile; puts airborne opponents into limited juggle state
Puts opponent into limited juggle state on hit; can be spaced safely due to its range and high active frame count; 3 extra recovery frames on whiff; the last 3 active frames have identical range (the listed best-case frame advantage is when spaced at max range, active frame 7)
1-hit projectile; puts airborne opponents into limited juggle state

2-hit projectile; puts opponent into limited juggle state on hit; only comes out when the HP button is pressed

2-hit OD projectile; puts opponent into limited juggle state on hit

3-hit OD projectile; puts opponent into limited juggle state on hit

Has juggle potential; cannot hit cross-up; does reduced damage and higher juggle limit on active frames 3-10 (weaker as a high-connect anti-air); higher knockdown advantage on the first 2 active frames (+37 refers to 1st active frame, +29 refers to anti-air with 3rd active frame; actual advantage varies based on height/distance)
Has juggle potential; puts opponent into limited juggle state (can juggle after a high corner anti-air); cannot hit cross-up; does reduced damage and higher juggle limit on active frames 4-10 (weaker as a high-connect anti-air)
Has juggle potential; cannot hit cross-up; does reduced damage and higher juggle limit on active frames 4-10 (weaker as a high-connect anti-air)

Has high juggle potential; cannot hit cross-up; only 2nd hit will connect if used too early as an anti-air; extends a combo-only hitbox to make the 1st active frame more consistent

Version canceled from 6HK; no follow-up juggle like after jumping Air Tatsu; the last frame of recovery puts Ryu in a crouching state; gives great midscreen oki on a grounded hit (can Dash + 6MP/6HP vs. Back Rise); useful juggle ender after midscreen OD High Blade Kick for damage and corner carry; gives higher KD Advantage on airborne hit (KD +41~46) but knocks the opponent farther away

Version canceled from 6HK; can hit crouching opponents unlike the jumping version; puts opponent into limited juggle state (follow-up only possible near the corner); the last frame of recovery puts Ryu in a crouching state
Can be input during forward jump; not an overhead; can cross-up (4f less blockstun when landing as a cross-up); at least +3 on block vs. crouching opponents; puts opponent into limited juggle state (can juggle 2HK or SA1); the last 13f of recovery puts Ryu in a crouching state
Can be input during forward jump; cannot hit cross-up; cannot hit crouching opponents (unless they extend a vertical hurtbox), and 1st hit can only hit standing opponents on the final 3 airborne frames of jump; puts opponent into limited juggle state; the last 13f of recovery puts Ryu in a crouching state

Can hold the button to charge to a higher level for more damage (in exchange for less invincibility); if button is held up to 5f after Super freeze, this invuln is extended up to the 2nd active frame (up to 18f); strike hitbox; Burnout chip damage does not changed based on charge level

Can hold the button to charge to a higher level for more damage (in exchange for less invincibility); if button is held up to 5f after Super freeze, this invuln is extended up to the 2nd active frame (up to 18f); strike hitbox; Burnout chip damage does not changed based on charge level; consumes Denjin stock for slightly more damage

Loses 4 invincibility frames if held; invincibility can be reduced to 1-7f if the button is held the minimum length of time for Lv.2 charge (6f after Super freeze); strike hitbox; Burnout chip damage does not changed based on charge level; consumes Denjin stock for slightly more damage; Denjin version gives the tumbling OTG state that can lead to follow-up juggles (this is the only version that incurs damage scaling in combos)
Loses 4 invincibility frames if held; full charge causes tumble OTG state; strike hitbox; Burnout chip damage does not changed based on charge level; extremely high pushback on block (can be difficult to punish without holding Parry into immediate Drive Rush); consumes Denjin stock for slightly more damage

Loses 4 invincibility frames if held; invincibility can be reduced to 1-7f if the button is held the minimum length of time for Lv.2 charge (6f after Super freeze); strike hitbox; Burnout chip damage does not changed based on charge level
Loses 4 invincibility frames if held; full charge causes tumble OTG state; strike hitbox; Burnout chip damage does not changed based on charge level; extremely high pushback on block (can be difficult to punish without holding Parry into immediate Drive Rush)

More hits connect on block vs. tall standing characters (these extra hits do not deal any additional Drive Damage on block); active frames 3-12 cause a non-cinematic hit that does reduced damage (400x4,2000); cannot anti-air cross-ups; starts up faster only when canceled from HP Shoryuken; cinematic time regenerates ~2.2 Drive bars for Ryu
More hits connect on block vs. tall standing characters (these extra hits do not deal any additional Drive Damage on block); active frames 3-12 cause a non-cinematic hit that does slightly reduced damage (400x2,1200x3); cannot anti-air cross-ups; starts up faster only when canceled from HP Shoryuken; available at 25% HP or below; cinematic time regenerates ~2.3 Drive bars for Ryu

5-hit Super projectile; button strength does not affect projectile speed; opponent cannot jump over projectile after Super freeze if within ~1/2 screen; can be preformed even when an OD Hadoken is on screen

8-hit Super projectile; button strength does not affect projectile speed; opponent cannot jump over projectile after Super freeze if within ~1/2 screen; consumes Denjin stock for slightly more damage and KD Advantage; can be performed even when an OD Hadoken is on screen

Performed by inputting 6HPHK during blockstun; 5f extra recovery on hit; freezes the screen for 4f during startup; see Drive Reversal.
Performed by holding 6HPHK on wakeup; 5f extra recovery on hit; does not have any screen freeze except for a 12f freeze when interacting with the opponent's throw hitbox (this also refunds 1 Drive bar after punishing the throw); see Drive Reversal.

See Drive Impact. Airborne connect gives spinning juggle state on Punish Counter or corner Wall Splat with variable height.

See Drive Parry. Perfect Parrying has only 1F of recovery and disables the opponent from canceling their attack. Perfect Parrying projectiles puts you into fixed 11 frames of recovery. After a Perfect Parry, all Super Gauge gain is reduced by 20% and Drive Gauge gain/damage is reduced by 50% for the entire punish combo.

See Drive Rush; 3-bar version performed on hit/block from a cancelable normal; can also be performed on whiff from cancelable light normals; startup refers to minimum time before an attack can cancel the Drive Rush animation; the first 15 recovery frames are cancelable into any attack; the final 22 recovery frames are cancelable into any attack or movement option or blocking (except Parry); only Normal and Command Normal attacks are enhanced with +4 frame advantage and improved juggle properties
See Drive Rush; 1-bar version performed out of a Parry; startup refers to minimum time before an attack can cancel the Drive Rush animation (if performed immediately after a successful Parry, only 1+8 startup); the first 15 recovery frames are cancelable into any attack; the final 22 recovery frames are cancelable into any attack or movement option or blocking (except Parry); only Normal and Command Normal attacks are enhanced with +4 frame advantage and improved juggle properties; Distance: 0.525 (min/throw), 1.878 (min/block), 3.628 (max/final DR frame)

"Come!"

"Your footwork's sloppy."

"Come on!"

*Slaps face*
Character data, frame data and patch notes are mirrored from the SuperCombo wiki, maintained by the community under CC BY-SA.