Jamie

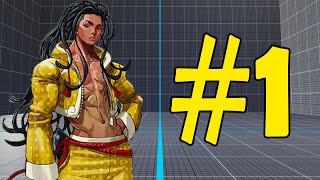
Who is Jamie?

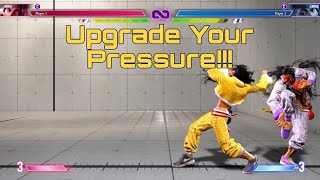
Jamie is a close-range fighter that specializes in poking, footsies, and harassment, with quick normals that he can use once he's in. He also benefits from a powerup system that allows his damage potential and flexibility to snowball the more chances he gets to power up.

Jamie's key mechanic is based on taking drinks. By using his forward throw, The Devil Inside, the Freeflow Kicks ending to his Freeflow Strikes special move, or certain target combos, Jamie can increase his Drink Level, up to a maximum of 4. Each time he drinks, his damage increases, bringing him to standard damage at Drink Lv. 2 and putting him above it at Drink Lv. 3 and higher. He also unlocks more target combos and special moves at specific Drink Levels, gradually opening up the complexity of his moveset and increasing his flexibility significantly; his most notable special move unlocks, in ascending order from Drink Lv. 1 to 4, are his aerial special move Luminous Dive Kick, his anti-projectile and super cancel bridge Bakkai, the command throw Tenshin, and the super-cancelable follow-up to his advancing move Swagger Step, the Swagger Hermit Punch. Jamie can also temporarily boost himself to Drink Lv. 4 (if he isn't already there) by using his Lv. 2 Super Art, The Devil's Song; if he already has 4 drinks, it instead becomes a tool to quickly replenish Drive Gauge and lets him keep up the pressure.

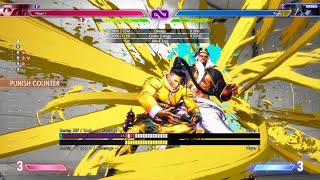
As far as his selection of normals and specials go, Jamie has 5MK, 2MK, and 5HK as strong cancelable pokes, as well as a grounded overhead in 6MK. He can use these moves, as well as careful uses of Freeflow Strikes and Swagger Step, to pester the opponent at close and mid range until they make a mistake. He also has 2HP and Arrow Kick as anti-air options, with Overdrive Arrow Kick explicitly serving as a reversal against aggressive opponents. Successful hits with sweep, Freeflow Strikes, Punish Counters, or any moves that knock the opponent down and away will give Jamie more time to drink without fear of repercussion, especially against opponents that aren't able to establish strong enough ranged pressure to stop Jamie from drinking when he's farther away from them.

In exchange for how powerful drinks make Jamie, though, it is no exaggeration to say that his gameplan is very much reliant on getting them, even if he doesn't make it to Drink Lv. 4 in a given round. Without drinks, Jamie lacks a lot of his most powerful tools, in addition to missing out on damage; it becomes an uphill battle to keep up unless he's gotten a few sips in, even with The Devil's Song acting as a Hail Mary option to close the gap in emergencies. It is also worth noting that Jamie's Drink Level does not carry over between rounds, meaning that he has to be prepared to get set up all over again, but once he gets going, he's a real menace. If you're looking for a bit of breaking and swaying alongside an infighter that only gets stronger when he's loaded up, then Jamie is your man.

Pick / Avoid

Play Jamie if…

  • Lethal at the Wheel: Pestering and rushing down opponents at close and close-mid range with strong poking normals and forward-moving specials

  • Party Starter: Gaining access to a wide variety of tricky tools over time, from a divekick, to a command grab, to several abnormal Target Combos

  • Don't Stop, Won't Stop!: Regaining Drive Gauge from drinks, amplifying your momentum and avoiding Burnout

  • Potential Man: Consistently buffed every big patch, give or take.

Think twice if…

  • Morning Regrets: Often needing to choose between unlocking new options and maintaining pressure after a combo

  • Returning to Zero: Losing your Drinks each round, forcing you to work back up to regain your tools and damage

  • No Easy Meter Dumps: A non-damaging SA2 and a launching SA3 that's weaker on average, requiring practice to make up the damage differences

Vitals

Health10,000
Fwd Walk
0.048
Back Walk
0.035
Fwd Dash
1.50
Back Dash
0.85
Fwd Jump
1.90
Back Jump
1.52
Jump Height
2.12
Throw Range
0.80
Drive Rush
2.03
Jump4+38+3 f

Guides & Data

Players to Watch

Community

Patch History

2.04013 Aug 2026Yasmine release. Balance changes for all characters.
  • Modern Controls:
  • Can now select the strength of Bakkai (236K) using 1S/2S/3S
  • 5LP (Drink Lv.1+)
  • Expanded the lower hitbox that can hit crouching opponents
  • 5HK
  • Pushback on block decreased
  • Can now cancel into MP Freeflow Strikes from max range for safe pressure
  • Range (2nd active frame) increased 1.803 → 1.903
  • The new extended portion of the hitbox has reduced pushback on hit and block
  • The block pushback at this range keeps Jamie at a nearly identical spacing (great for corner spacing traps)
  • Full Moon Kick (6MK~MK~P, Drink Lv. 2+)
  • Damage (2nd hit) increased 200x2 → 300x2
  • KD Advantage (after Drink) increased -1 → +2
  • KD Advantage (transition from DL3 → DL4) increased +2 → +5
  • Jamie can now always push a corner mixup after increasing his Drink Level, and gets stronger pressure after the DL4 transition
  • Intoxicated Assault (4HP~HP~HK, Drink Lv.3+)
  • 2nd hit is now cancelable into special moves and Drive Rush (instead of only Supers / TC)
  • Drive Rush cancel advantage: +15 oH / +3 oB
  • This greatly improves the potential midscreen damage and allows safe cancels like OD Freeflow Strikes
  • 3rd hit now causes a limited juggle wall splat if the opponent reaches the corner (from ~40% screen length)
  • Wall Splat KD Advantage varies based on distance from corner (+43~71); opponent drops straight to the ground if used as the 2nd non-DI wall splat in one combo
  • Can follow up with 2HK / 623K / SA1 / SA3 deep in the corner, with slower/stronger moves becoming possible when starting from farther away
  • Greatly improves Jamie's meterless damage potential after OD Tenshin or Drive Impact near the corner (must wait for opponent to become airborne if starting from a crumple state)
  • Input buffer window increased after the 3rd hit for easier follow-up timing
  • Freeflow Strikes + Punches (236P~6P~6P, Drink Lv. 0-3)
  • 1st and 2nd attacks:
  • Decreased aerial knockback for improved juggle consistency
  • 2nd and 3rd attacks:
  • Hitboxes expanded forward, and increased forward momentum on LP/MP versions
  • 2nd attack range increased: 1.856 → 1.936 (LP) / 2.259 → 2.319 (MP)
  • 3rd attack range increased: 2.327 → 2.807 (LP) / 2.907 → 3.167 (MP) / 3.602 → 3.702 (HP)
  • 3rd attack:
  • KD Advantage on grounded opponents increased +27 → +31
  • Improved oki, notably sets up meaty HP Swagger Step in the corner (+4 oB)
  • DL4 Freeflow Strikes + Punches (236P~6P~6P, Drink Lv. 4)
  • 1st and 2nd attacks:
  • Decreased aerial knockback for improved juggle consistency
  • 3rd attack:
  • KD Advantage on grounded opponents increased +27 → +31
  • Juggle Limit increased 7,7,10 → 7,8,10
  • Ensures that the 2nd hit cannot whiff mid-combo as a result of the juggle counter
  • OD Freeflow Strikes + Punches (236PP~6P~6P, Drink Lv. 0-3)
  • 1st and 2nd attacks:
  • Decreased aerial knockback for improved juggle consistency
  • Drive Damage on Block decreased 2500 → 2000
  • Cancel window into Rekka follow-up increased by 2 frames
  • Hitconfirm window: 23 → 25 (1st) / 19 → 21 (2nd)
  • 2nd attack:
  • Recovery decreased 28 → 22
  • Total animation decreased 42 → 36
  • Hitstun decreased 27 → 23
  • Hit Advantage increased -3 → -1
  • Block Advantage increased -9 → -3
  • Perfect Parry Advantage increased -28 → -22
  • These changes allow Jamie to safely attempt a frame trap with the 2nd OD Rekka and greatly improve his Burnout pressure
  • 3rd attack:
  • KD Advantage on grounded opponents increased +28 → +34
  • Gives improved oki, like a meaty DR~6MK (+7 oH / +3 oB)
  • DL4 OD Freeflow Strikes + Punches (236PP~6P~6P, Drink Lv. 4)
  • 1st and 2nd attacks:
  • Decreased aerial knockback for improved juggle consistency
  • 1st attack:
  • Drive Damage on Block decreased 1500,3500 → 1000,3500
  • Total Blockstun increased 30 → 32
  • Block Advantage increased -3 → -1
  • SA2 Cancel Block Advantage (2nd hit) increased +12 → +14
  • Can now create a true blockstring into the 6P follow-up
  • 2nd attack:
  • Drive Damage on Block decreased 1500x2 → 1000x2
  • Recovery decreased 27 → 22
  • Total animation decreased 50 → 45
  • Total Hitstun decreased 34 → 30
  • Hit Advantage increased -2 → -1
  • Total Blockstun increased 26 → 28
  • Block Advantage increased -10 → -3
  • Perfect Parry Advantage increased -27 → -22
  • 3rd attack:
  • KD Advantage on grounded opponents increased +28 → +34
  • Juggle Limit increased 7,7,10 → 7,8,10
  • Ensures that the 2nd hit cannot whiff mid-combo as a result of the juggle counter
  • Freeflow Strikes + Kicks (236P/PP~6K~6K)
  • All versions have decreased aerial knockback for improved juggle consistency (especially midscreen)
  • Swagger Step (214P/PP)
  • On later active frames where the move becomes plus on block, decreased pushback on block and added screen shake
  • Applies to active frames 8-9 (LP/MP) / 5-9 (HP) / 3-9 (OD)
  • This allows Jamie to take advantage of plus frames on a well-spaced Swagger Step
  • Screen shake does not occur if the move only has slight block advantage due to Burnout
  • LP/MP versions:
  • Decreased forward range on active frames 5-7 (easier to space so that active frames 8-9 can give advantage on block)
  • Bakkai (236K, Drink Lv.2+)
  • Juggle Increase value decreased 1 → 0 on all hits except the final hit
  • This change ensures that no hits will whiff mid-combo as a result of the juggle counter
  • OD Bakkai (236KK, Drink Level 2+)
  • Juggle Increase value decreased 1x10 → 1,0x8,1
  • Juggle Limit increased 15x9,20 → 15,16x8,20
  • These changes ensure no hits will whiff mid-combo as a result of the juggle counter
  • The juggle counter will now only increase by 1 when a juggled 236KK is canceled into SA2, ensuring that 623LK/623KK can combo afterward

Character data, frame data and patch notes are mirrored from the SuperCombo wiki, maintained by the community under CC BY-SA.