5LP
Standing Light Punch
- Startup
- 4
- Active
- 3
- Recovery
- 7
- On hit
- +4
- On block
- -1
- Damage
- 300
- Guard
- LH
- Cancel
- Chn Sp SA
- Total
- 13
- Punish counter
- +8
- Drive dmg (block)
- 500
- Drive gain
- 250
Chains into 5LP/2LP/2LK; Run~Stop cancel: -14/-19
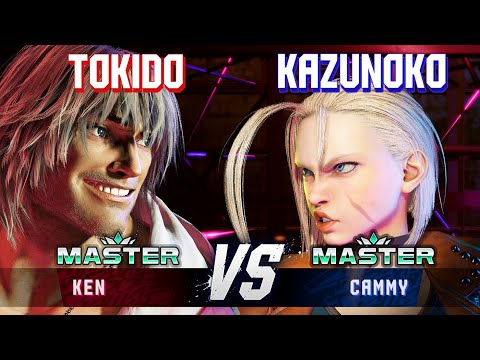
The original shotoclone, Ken is very similar to his old training partner Ryu. Both characters have fairly similar movesets, but Ken carves out a path all his own. With emphasis on aggression and close-range combat, Ken acts as a more offense focused alternative to the Shoto playstyle.
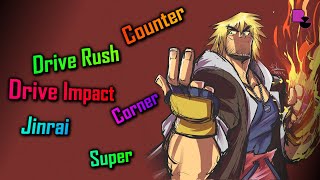
Ken shares the iconic Hadoken and Shoryuken with Ryu, but there's about where their kits begin to diverge. Ken's signature special is his command sprint Quick Dash, which can be used both as a pressure tool and to empower his other specials. If certain specials are used out of Quick Dash, they gain enhanced properties rivalling that of Overdrive moves. In particular, while his normal Tatsumaki is a decent combo ender, Dash Tatsumaki gives incredible corner carry off of any clean hit. Each of these enhanced specials act as different combo enders or extenders, and each one gives something valuable to Ken's kit, whether that be corner carry, strong okizeme, or even sideswapping mid-combo.
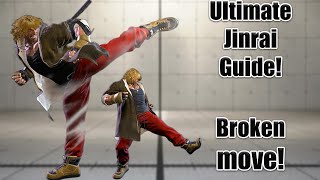
Excellent corner carry is a running theme in Ken's kit. While he pokes with 5MK, 2MK and 5HP, Ken looks for a clean hit to Drive Rush. After a confirm, Ken can carry you all the way to the corner and set you up for some truly nasty corner pressure. Any successful hit leads into powerful corner combos that deal great damage and give good okizeme, allowing him to loop pressure continuously. The Jinrai Series of kicks acts as great rekka pressure options in this scenario, and even come with built-in mixup tools. All of this adds up to Ken being a neutral and offense monster, capable of easily tagging the opponent and dragging them into the corner off of any successful opening.
While Ken may seem like an offensive rushdown monster at first, what keeps him in check is the considerably bad block advantage on many of his moves. Each version of Jinrai Kicks and Dragon Lash are either punishable on block or interruptible, causing his offense to be based on making the opponent unsure of when to press. Smart players will quickly learn not to press until something punishable comes out, which can force Ken to play reactively and wait for the opponent to give him an opening.
Due to the stubby range of Ken's 5MP, he may sometimes struggle confirming into his important combos—but with smart use of Run and Drive Rush, he is able to get great confirms from very far away. Learning his Run combos to capitalize on openings can also be somewhat tricky. But overall, Ken is another great character to learn Street Fighter with. If you like aggression, strong confirms, combo expression, and enjoy kicking so hard you set things on fire, you really can't go wrong with Ken.
What if the Jack had a flaming uppercut...: A shoto kit with a tilt towards the close-mid range
Coast to Coast: Strong corner carry and oki from most hits
Inflammatory Pressure: Sticky and ambiguous pressure
...but his fireball was worse: Not being able to stay fullscreen easily
Average Damage: Thriving on looped situations rather than huge damage
DRC Man: Relying on system mechanics rather than unique character traits
Chains into 5LP/2LP/2LK; Run~Stop cancel: -14/-19

Easily hitconfirmable into Target Combo; farthest ~40% of hitbox is shifted upward (can whiff against some crouching attack hurtboxes in whiff punish scenarios); extends a forward leg hurtbox until end of recovery; Run~Stop cancel: -6/-12

Puts opponent into limited juggle state; Run~Stop cancel: KD+30/-12

Great poke in neutral; large number of active frames make it a great meaty; when used out of Drive Rush, links into 2MK on hit or gives pressure on block; Run~Stop cancel: -3/-8

Incredible range for a light normal and a great whiff punish; Run~Stop cancel: -14/-16; DR cancel is delayed until after 2nd active frame

Has good forward movement; whiffs on crouching opponents at farther ranges unless they extend a vertical hurtbox; hitconfirmable Target Combo follow-up makes it strong in neutral; Super is much harder to hitconfirm but can buffer into a safe SA2 in neutral; front leg hurtbox is raised on frames 4-15, allowing it to dodge some low attacks

(refers to scaled damage); great forward movement, will combo even if 5MK hits an extended limb hurtbox; true blockstring even at max delay

(refers to scaled damage); 2f gap between final 2 hits on block; whiffs on crouch blocking opponents (much more unsafe); 2f worse KD Adv. if only the final hit connects

Excellent ranged poke and whiff punish tool; even at max range, can convert Punish Counter spinning juggle state into 623KK or Drive Rush 5HP juggles; 2 extra recovery frames on whiff; extends a hurtbox 1f before active that is vulnerable to projectiles

Primary combo starter; chains into 5LP/2LP/2LK; Run~Stop cancel: -12/-18; DR cancel is delayed until after 1st recovery frame; topmost hurtbox on frames 1-5 is vulnerable only to aerial strikes (preventing its use as an anti-air)

Good buffer tool and great for pressure out of Drive Rush; Run~Stop cancel: -6/-11; 2f extra recovery on whiff and extends a wider hurtbox until the end of recovery; topmost hurtbox on frames 1-8 is vulnerable only to aerial strikes (preventing its use as an anti-air); strong combo tool that can link to 5MP at point blank range; strong counter-poke that can link to 2MK on counter-hit

Forces stand; decent anti-air (cannot hit cross-up); only first 2 active frames are cancelable; cancel into 236HK on block leaves a 5f gap and is DI-safe; Run~Stop cancel: +3/-7

Chains into 5LP/2LP/2LK

Run~Stop cancel: -8/-12; DR cancel is delayed until after active frames

Has juggle potential; on block, always plays out a fixed 27f recovery (cannot be made safer with meaty timing)


Puts airborne opponents into limited juggle state; cancels to j.214K with a long cancel window; lower body projectile invuln 6-22f (if used immediately on the way up, can avoid the 2nd hit of JP's OD Amnesia bombs)

Spike Knockdown on counter-hit/Punish Counter vs. airborne opponents; great downward hitbox for close jump-ins and neutral jump throw baits; lower body projectile invuln 9-23f except around attack hitbox (cannot be used to avoid the 2nd hit of JP's OD Amnesia bombs)

Cross-up

Cross-up; lower body projectile invuln 7-20f (if used immediately on the way up, can avoid the 2nd hit of JP's OD Amnesia bombs)

Great horizontal range for a jump-in; lower body projectile invuln 10-19f except around attack hitbox (cannot be used to avoid the 2nd hit of JP's OD Amnesia bombs)

Strong and fast air-to-air; lower body projectile invuln 6-19f (if used immediately on the way up, can avoid the 2nd hit of JP's OD Amnesia bombs)

Side switches, has great corner carry; does not allow throw/strike oki after back throwing opponent into corner; a successful Throw Escape builds 0.5 Drive bars for the defender; Throw Escape is awarded to a random player if input simultaneously
Can walk forward for a corner throw loop with 1f timing vs. standard size characters (2f vs. Marisa, 3f vs. Blanka/E.Honda, 4f vs. Zangief); can also Drive Rush for easy manual timing (can whiff DR~5LP to bait 5f reversals, but is punished by reversal 4f lights); only +1 after forward dash (can pressure with jabs, but throw loses to 4f); can use Drive Rush meaty normals after a midscreen throw; a successful Throw Escape builds 0.5 Drive bars for the defender; Throw Escape is awarded to a random player if input simultaneously
2nd and 3rd hits whiff on crouching opponents (unsafe on crouching hit or block); same knockdown advantage regardless of which hit initially connects; cannot hit cross-up

Great range and speed, useful in whiff punishes and juggles; cannot hit cross-up

Puts opponent into limited juggle state if 1st hit connects; if the first hit whiffs the second hit will always do 700 damage, but has worse KD Adv.; both hits connect on crouching opponents; cannot hit cross-up
Better KD Adv. if first hit connects; both hits connect on crouching opponents; cannot hit cross-up

Puts opponents into limited juggle state; follow-up can be delayed up to 5f if input as late as possible (affecting frame trap and juggle opportunities); follow-ups can also be input on whiff; good approach tool that doesn't extend a hurtbox until active
1-hit projectile; puts airborne opponents into limited juggle state

Follow-up can be delayed up to 6f if input as late as possible (affecting frame trap and juggle opportunities); follow-ups can also be input on whiff

Follow-up can be input on hit/block/whiff; whiffs on crouching opponents (-18 vs. crouch block); true blockstring vs. stand block, can be delayed to create up to 3f gap or to connect on high-juggled opponents

Follow-up can be input on hit/block/whiff; only combos on standing opponents because the 6HK whiffs on crouchers; 7f gap between final 2 hits on stand block (20f if 2nd hit whiffs vs. crouching); (refers to scaled damage); starter scaling reduces the effectiveness of fishing for frame trap into SA2 cancel

Follow-up can be input on hit/block/whiff; +7 Punish Counter only possible if first hit whiffs; always a true blockstring even if delayed

Follow-up can be input on hit/block/whiff; 2f gap between final 2 hits on block; (refers to scaled damage); starter scaling reduces the effectiveness of fishing for frame trap into SA2 cancel

Follow-up can be input on hit/block/whiff; 4f gap between hits on block, good for setting up trade combos (up to 10f gap if delayed); causes OTG bounce vs. airborne opponents; lifts Ken's leg hurtbox on frames 5-18, allowing it to dodge some low attacks

Follow-up can be input on hit/block/whiff; final 2 hits are a true blockstring; (refers to scaled damage)

Follow-up can be input on hit/block/whiff; better KD Adv. after 236HK launch; whiffs on crouching opponents unless they extend a vertical hurtbox (236LK -23/-35; 236MK -22/-31; 236HK KD/-26)

Follow-up can be input on hit/block/whiff; using 236MK~6LK will counter-hit any opponent button; causes a +32 Hard Knockdown on Counter-hit/Punish Counter (gives good oki but prevents follow-up links)

Follow-up can be input on hit/block/whiff; lifts Ken's leg hurtbox on frames 4-21, allowing it to dodge some low attacks; due to its slow startup, opponent can easily switch from low block to high block to cover both mixup options; puts airborne opponents into limited juggle OTG bounce state (can only follow up with SA3 cancel if the juggle was started with the 6MK follow-up)

Follow-up can be delayed up to 3f if input as late as possible (affecting frame trap and juggle opportunities); follow-ups can also be input on whiff

1-hit projectile; puts airborne opponents into limited juggle state; useful for meaty corner setups if well-spaced, preventing wakeup SA1
Follow-up can be delayed up to 2f if input as late as possible (affecting frame trap and juggle opportunities); best starter for frame trapping into 6LK follow-up; follow-ups can also be input on whiff
1-hit projectile; puts airborne opponents into limited juggle state

2-hit OD projectile with extremely fast recovery; at some ranges, Ken can follow up with Drive Rush to combo afterwards; puts airborne opponents into limited juggle state
Can dodge lows until frame 40; first 2 active frames only hit airborne, causing spike knockdown on hit or OTG bounce on Punish Counter; 1f better hit/block advantage vs. crouching opponents; cannot hit cross-up
Good anti-air; 3rd hit whiffs vs. crouch block (2f worse advantage, 75 less chip dmg); cannot hit cross-up

Can dodge lows until frame 32; initial active frames 2(7)1 only hit airborne opponents for an OTG bounce and side switch; next 3 active frames only hit standing opponents; 3f better hit/block advantage vs. crouching opponents (allows link into 2LP); cannot hit cross-up

Can dodge lows until frame 32; first 3 active frames only hit airborne and do 1000 damage, causing spike knockdown on hit or OTG bounce on Punish Counter; hits standing and crouching opponents on 4th active frame onward, dealing 950 damage; cannot hit cross-up

Good anti-air; cannot hit cross-up; reduced damage on high anti-air connect (active frames 3-10)
Can dodge lows until frame 37; first 2 active frames only hit airborne, causing spike knockdown on hit or OTG bounce on Punish Counter; 1f better hit/block advantage vs. crouching opponents; cannot hit cross-up
Good anti-air; cannot hit cross-up

All hits are a true blockstring; Ken's best reversal option; cannot hit cross-up

Forward jump only; can hit cross-up; puts opponent into limited juggle state; the last 11f of recovery puts Ken in a crouching state

Forward jump only; 7f extra landing recovery on whiff; can hit twice vs. airborne opponents; can hit cross-up (deals 5f less hitstun, 200 less damage); Ken is in a crouching state from 4th landing recovery frame onward

Can input LK/MK follow-ups on frames 11-31 and HK followup on frames 9-31; follow-ups will not reverse direction if crossing under opponent; Ken is in counter-hit state for entire duration; inputting with 5KKK causes Quick Dash to take priority over OD special moves when they overlap (inputting with just 5KK gives priority to an OD special move instead); Run Distance: 2.92

Meterless only, does not vary by button strength; alternates between forward/backward hits; backwards hitbox can pull opponent towards Ken from behind; CH/PC advantage carries through all hits, making it a great punish starter against very unsafe moves; leaves Ken at close range for a strike/throw mixup on grounded hits; () refers to knockdown advantage when canceled from 5MP~HP
Meterless only, does not vary by button strength; properties similar to 623KK (startup, hits twice in juggles, side switch, 2f better advantage vs. crouch); lower OTG bounce height than 623KK; functional startup vs. standing opponents is 11+20f

Meterless only, does not vary by button strength; final hit whiffs vs. crouch block (1f worse advantage, 75 less chip dmg); cannot hit cross-up

Acts like a Normal Attack for Super canceling (including no extra damage scaling when canceled to SA3); puts airborne opponents into limited juggle state; unsafe at closer ranges but can be spaced safely; extends a forward hurtbox during recovery; 4f extra recovery on whiff or when absorbed by armor (guaranteed DI punish if absorbed and not canceled into Super)

27f is fastest total Run~Stop time; Ken is in counter-hit state for entire duration; no head hurtbox during the entire 16f recovery; Run Distance: 1.37 (earliest stop)

Ken's only overhead outside of Jinrai Kick follow-ups; notably can't benefit from Drive Rush like other overheads, but can be used in meaty setups (+4) to link afterwards; lifts Ken's leg hurtbox on frames 10-20, allowing it to dodge some low attacks

Switches sides with opponent on hit; Full Dmg distribution: 500,300x2,900

Fast startup and good range, making it good for punishes and juggle combos; completely safe on block due to pushback; great chip tool vs. opponents in Burnout (can continue dealing more chip after being safely blocked); benefits from 20% Counter-hit/Punish Counter damage increase unlike most Supers; Full Dmg distribution: 300x4,200x5,600

1st hit leads to full animation (non-cinematic damage varies based on juggle height, and allows a follow-up juggle); 2 hits whiff on crouch block (reduced chip, slightly worse advantage); cinematic time regenerates ~2 Drive bars for Ken

1st hit leads to full animation (non-cinematic damage varies based on juggle height, and allows a follow-up juggle); 2 hits whiff on crouch block (reduced chip, slightly worse advantage); available at 25% HP or below; cinematic time regenerates ~2.1 Drive bars for Ken

Performed by inputting 6HPHK during blockstun; 5f extra recovery on hit; freezes the screen for 4f during startup; see Drive Reversal.
Performed by holding 6HPHK on wakeup; 5f extra recovery on hit; does not have any screen freeze except for a 12f freeze when interacting with the opponent's throw hitbox (this also refunds 1 Drive bar after punishing the throw); see Drive Reversal.

See Drive Impact. Airborne connect gives spinning juggle state on Punish Counter or corner Wall Splat with variable height.

See Drive Parry. Perfect Parrying has only 1F of recovery and disables the opponent from canceling their attack. Perfect Parrying projectiles puts you into fixed 11 frames of recovery. After a Perfect Parry, all Super Gauge gain is reduced by 20% and Drive Gauge gain/damage is reduced by 50% for the entire punish combo.

See Drive Rush; 3-bar version performed on hit/block from a cancelable normal; can also be performed on whiff from cancelable light normals; startup refers to minimum time before an attack can cancel the Drive Rush animation; the first 15 recovery frames are cancelable into any attack; the final 22 recovery frames are cancelable into any attack or movement option or blocking (except Parry); only Normal and Command Normal attacks are enhanced with +4 frame advantage and improved juggle properties
See Drive Rush; 1-bar version performed out of a Parry; startup refers to minimum time before an attack can cancel the Drive Rush animation (if performed immediately after a successful Parry, only 1+8 startup); the first 15 recovery frames are cancelable into any attack; the final 22 recovery frames are cancelable into any attack or movement option or blocking (except Parry); only Normal and Command Normal attacks are enhanced with +4 frame advantage and improved juggle properties; Distance: 0.745 (min/throw), 2.449 (min/block), 3.721 (max/final DR frame)

"Now's not the time for jokes."

"Bring it!"

"What's up, having second thoughts?"
Character data, frame data and patch notes are mirrored from the SuperCombo wiki, maintained by the community under CC BY-SA.